Multilevel Lists
Multilevel lists are not as simple as single level lists and bullet lists, and are something many people find challenging and frustrating.
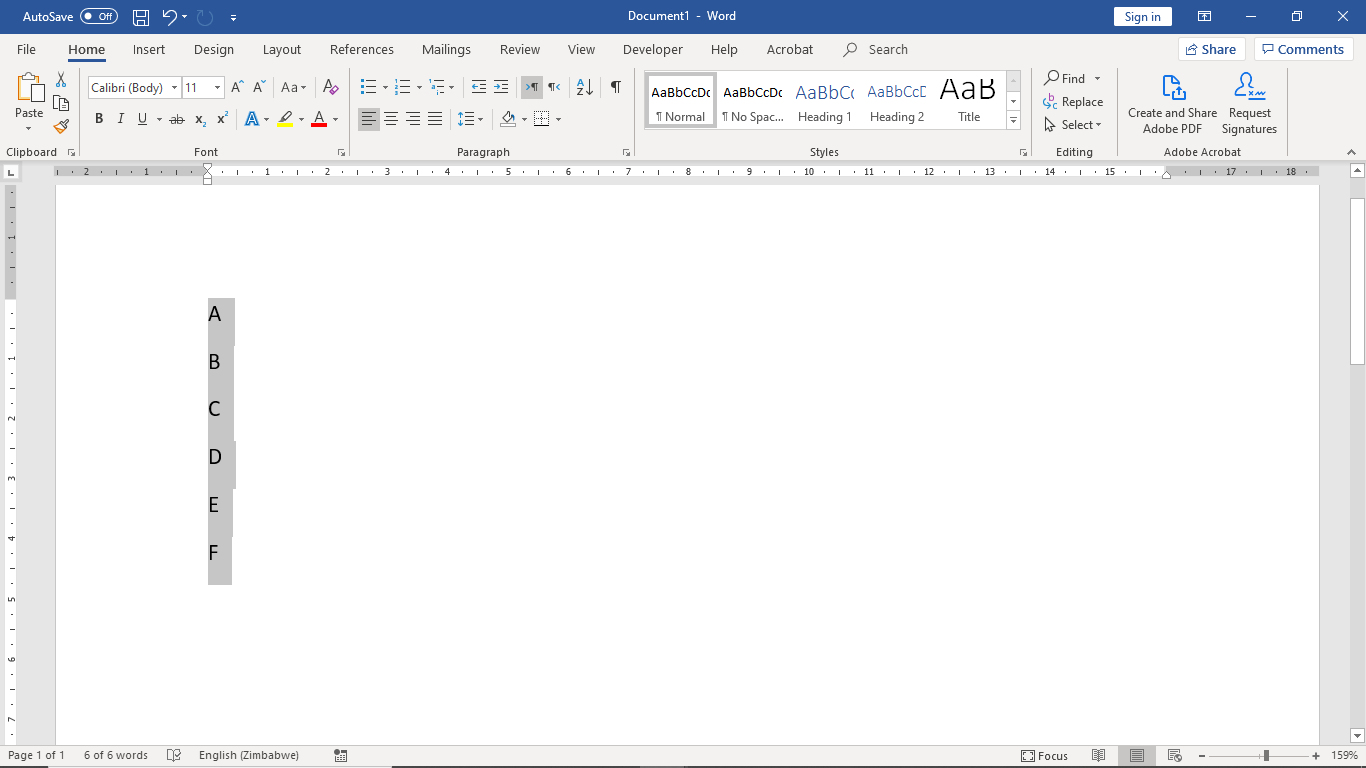
To go over and cover all the multilevel list options, we will define a new multilevel list. Start by creating a list of paragraphs (see picture below).
 |
Highlight the list and click the multilevel lists dropdown button in the Paragraph group, in the Home ribbon (see picture above).
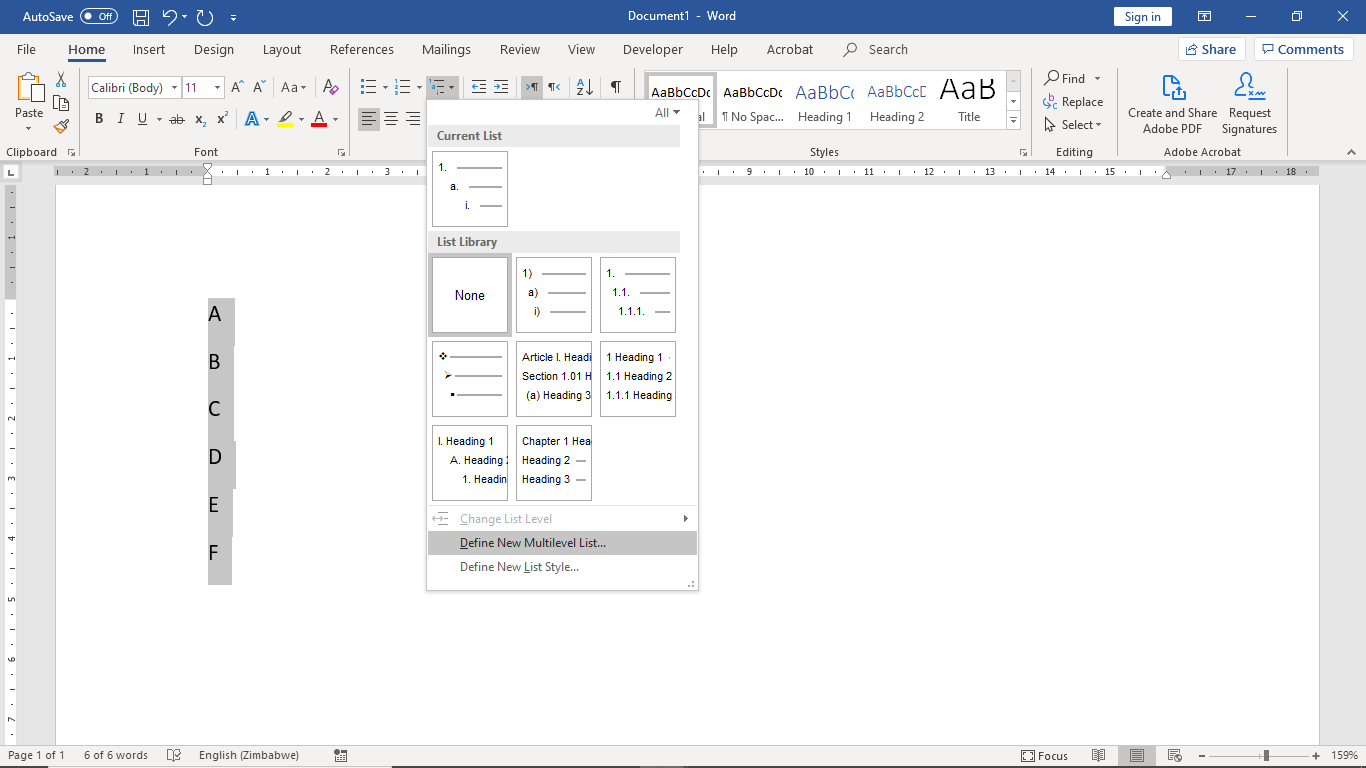 |
Word comes with a number of preset multilevel lists but we will be creating a new list.
To open the Define New Multilevel List dialog box, click the Define New Multilevel List… item at the bottom of the dropdown menu (see picture below).
 |
The Define Multilevel List dialog box lets you define up to 9 levels. We will only set 3 levels (in most cases setting 3 to 5 levels is more than enough).
Select level 1 under Click level to modify at the top. Clear the Enter formatting for number field in the Number format field set. Select the 1, 2, 3, … option in the Number style for this level field and type ".".
In the Position field set, set the Number alignment field to Left, the Aligned at field to 0" and the Text indent at field to 0.5".
Select level 2. Clear the Enter formatting for number field. Select the Level 1 option from Include level number from field, type ".", select the 1, 2, 3, … option in the Number style for this level field and type ".".
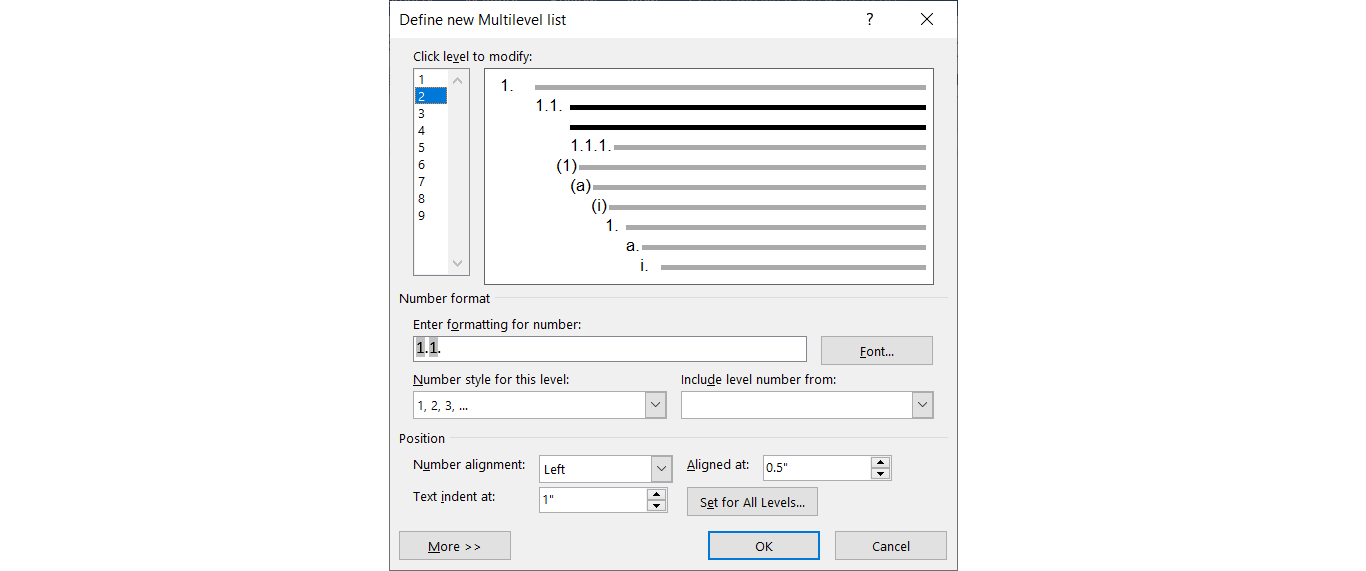
Set the Aligned at field to 0.5" and the Text indent at field to 1".
Select level 3. Clear the Enter formatting or number field. Select the Level 1 option from the Include level number from field, type ".", select the Level 2 option, type ".", select the 1, 2, 3, … option in the Number style for this level field and type ".".
Set the Aligned at field to 1" and the Text indent at field to 1.5" (see picture below).
 |
Click the OK button to save the changes and close the dialog box.
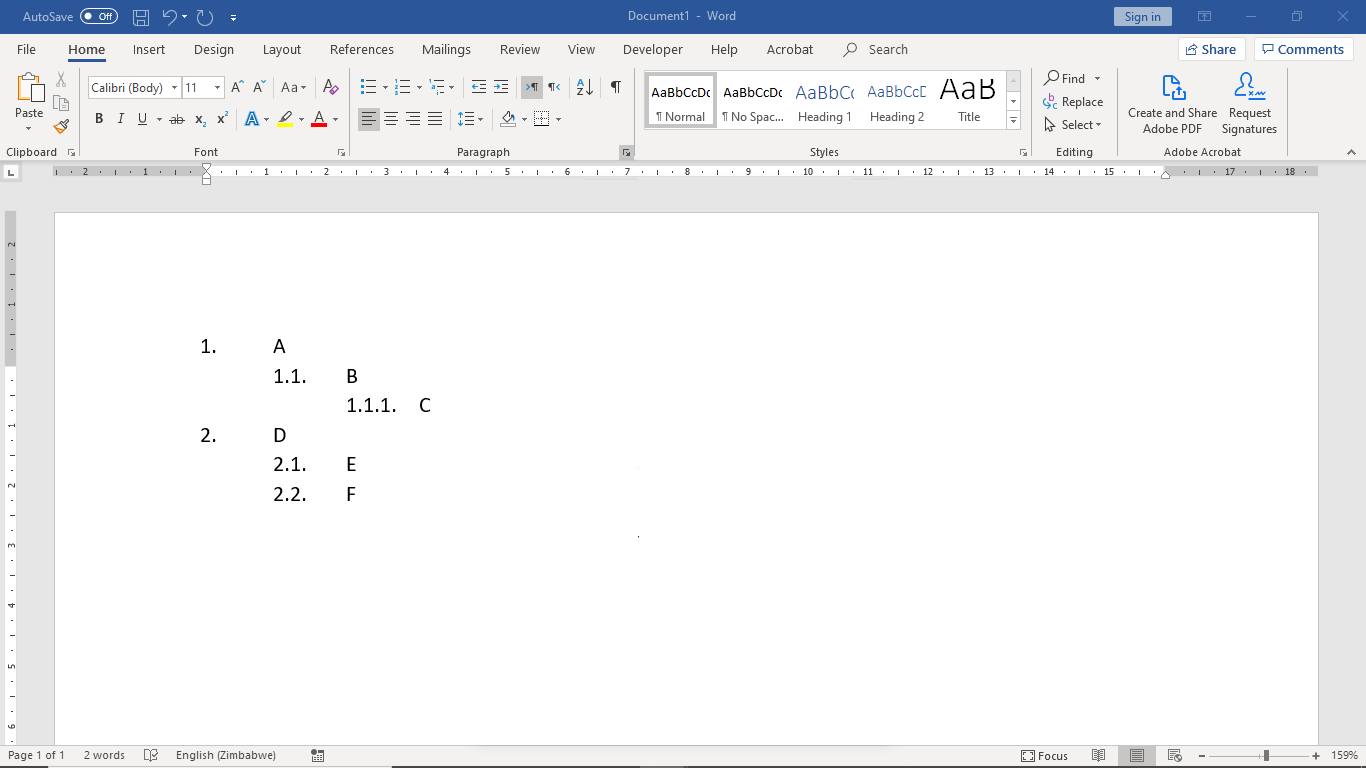
To increase or decrease the list item level, press the Tab and Shift-Tab keys. Alternatively, use the Increase Indent and Decrease Indent buttons in the Paragraph group, in the Home ribbon (see picture below).
 |
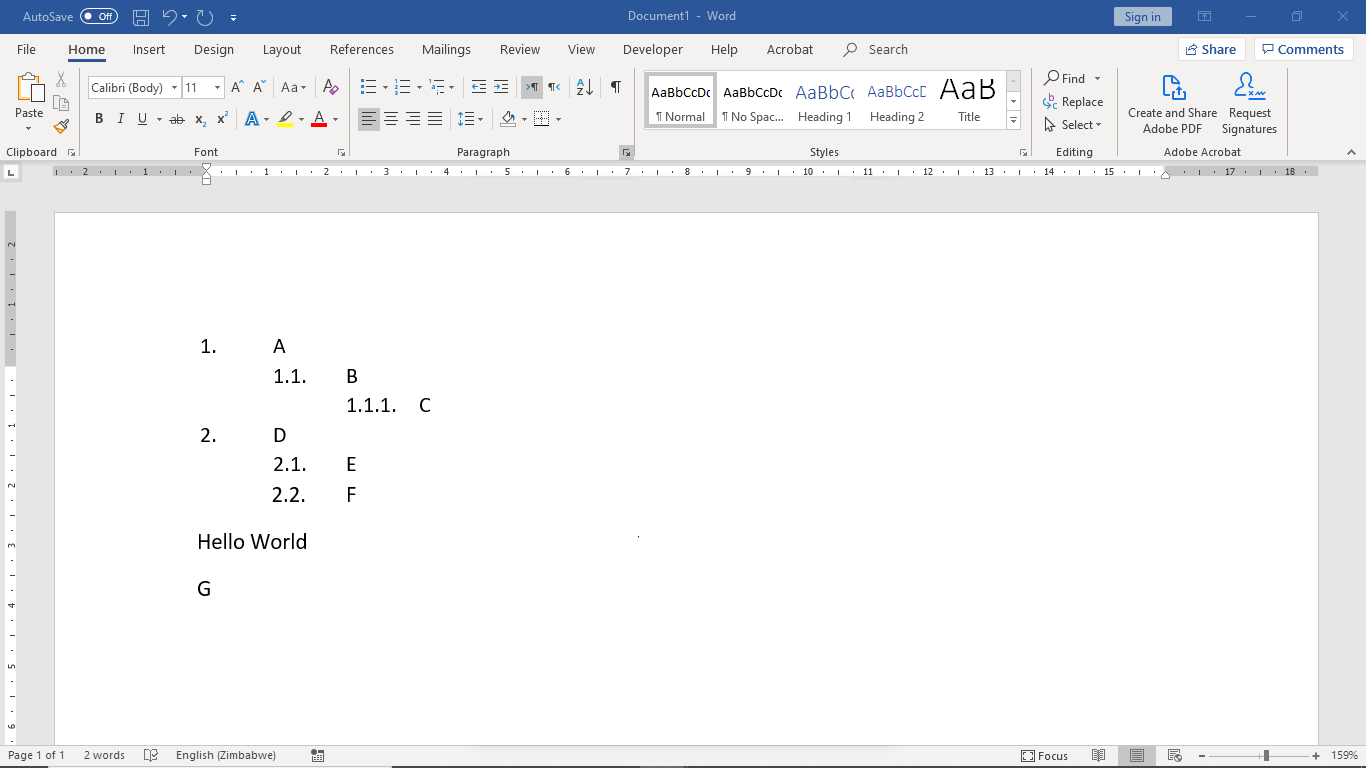
To close the list, go to the end of the list and type the Enter key twice. You can do the same to create a break in the middle of the list.
Type some text, press the Enter key, type another list item and press the Enter key again (see picture below).
 |
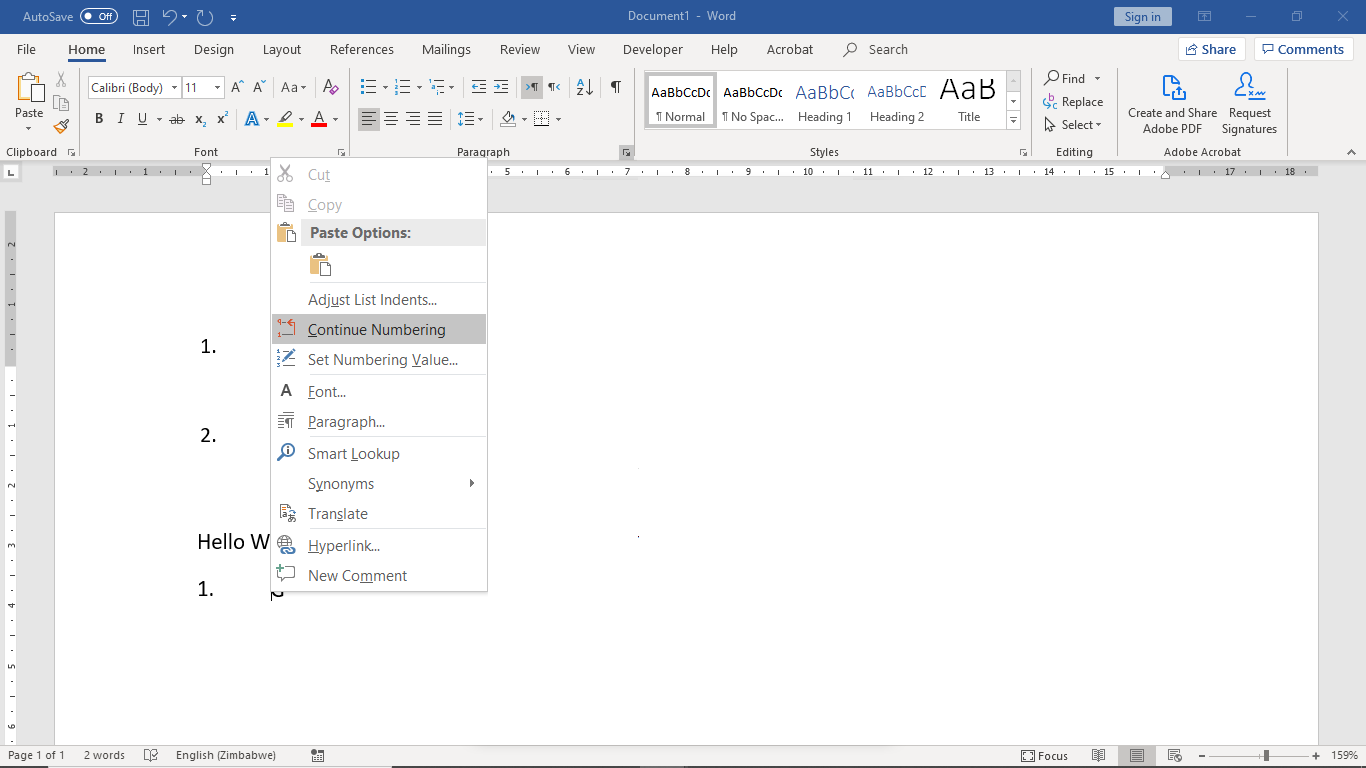
To continue the list, place the cursor on the new list item. Click the multilevel list dropdown button and select the list under the Lists in Current Documents section.
However, instead of continuing the list a new list is started because there is something between our list and the new list item.
To continue the list, right-click the list item and click Continue Numbering… from the dropdown menu. Make sure you are using the same lists (see picture below).
 |
Linking Multilevel Lists and Named Styles
We will continue our previous list and link it to the heading styles.
To open the Define New Multilevel List dialog box to continue modifying our list, place the cursor anywhere on the list and click the Define New Multilevel List… item.
When using multilevel lists with heading styles it is a common practice to not use indentation so we will first remove the indentation from the list.
Select levels 1. Set the Aligned at field to 0" and the Indent text at field to 0". Click the Set for All Levels button and click OK (see picture below).
Click the More button at the bottom left corner of the dialog box to show more fields (see picture below).
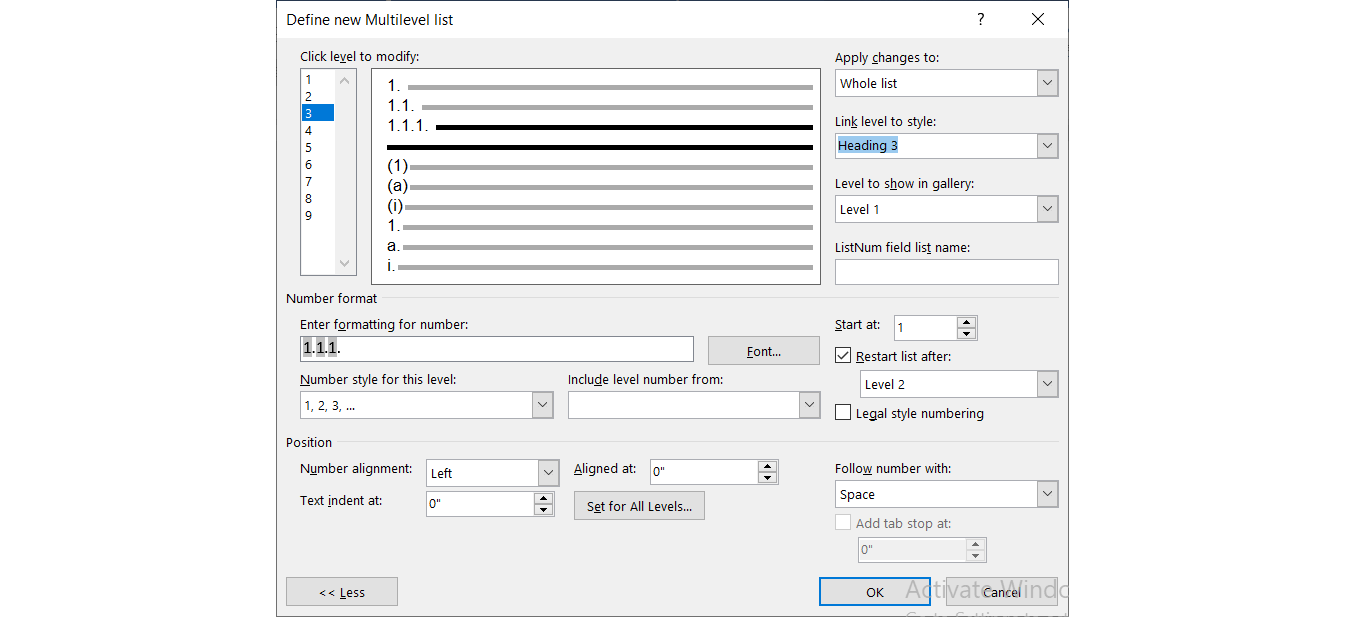 |
For levels 1 to 3 set the Follow number with field to Space and the Link level to style field to Heading 1 to 3 respectively.
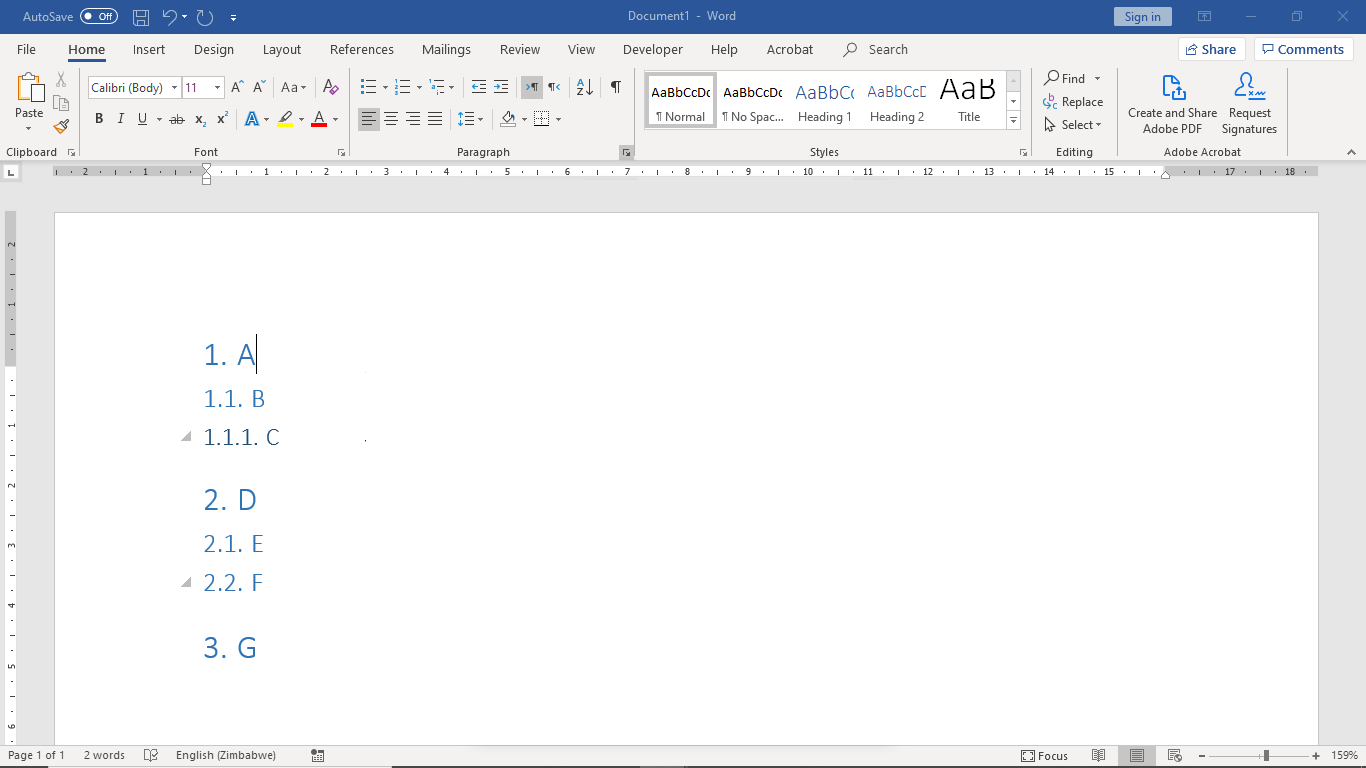
Click the OK button to save the changes and close the dialog box. Now creating a list sets the heading styles and setting the heading styles creates a list.
 |