Word Paging Features
The Word paging features are easy to use but Word only has basic paging features.
Word Paging Exercise
Open word_paging.docx in the DocxFactory/exercises/templates/ directory (see picture below).
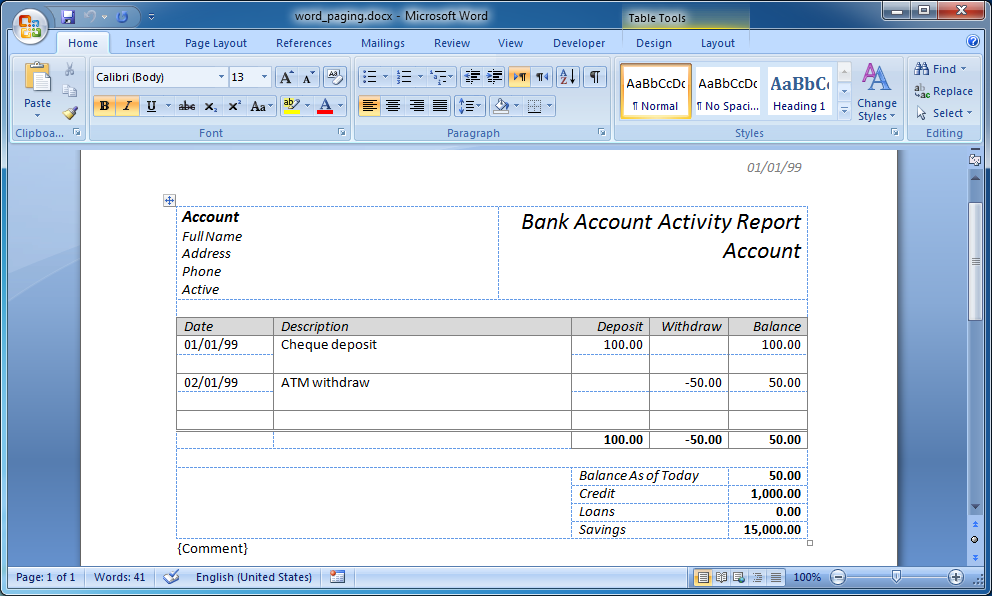
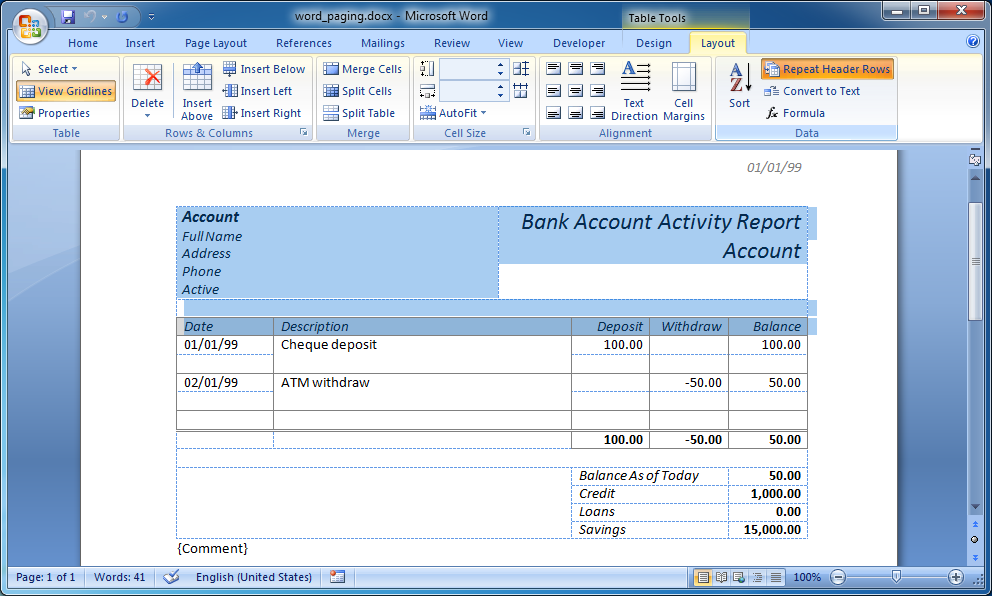
Mark the table rows from the first table row to the column labels (including the column labels) in the Account item as Repeat Header so they will be repeated for every page.
Because you can only have one level of repeating headers in the Word paging features, you can either mark the report header and the column labels or only the column labels as Repeat Header.
Highlight the table rows from the first table row to the column labels (including the column labels) in the Account item and select the Repeat Header Rows in the Layout ribbon (see picture below).
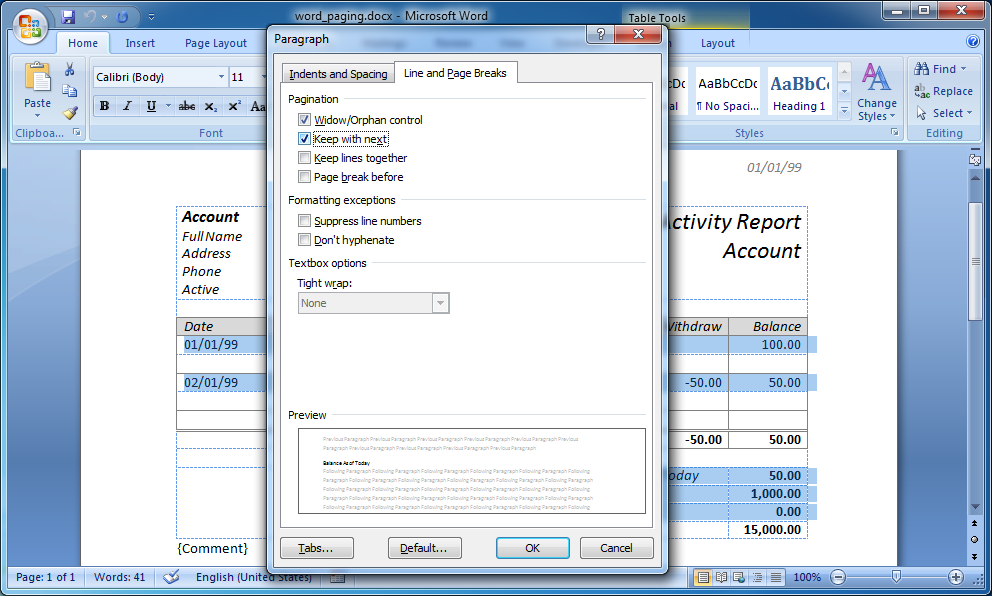
Chain the table rows of the Withdraw, Deposit and Summary items using Keep with next so the table rows cannot be split across pages and must stay whole.
Highlight the first table row of the Withdraw and Deposit line items and the first 3 table rows of the Summary item, open the Paragraph dialog box in the Home ribbon and select Keep with next in the Line and Page Breaks tab (see picture below).
Select the Keep lines together for the Comment item so the paragraph lines cannot be split across pages and must stay whole.
Highlight the comment item, open the Paragraph dialog box in the Home ribbon and select Keep lines together in the Line and Page Breaks tab (see picture below).
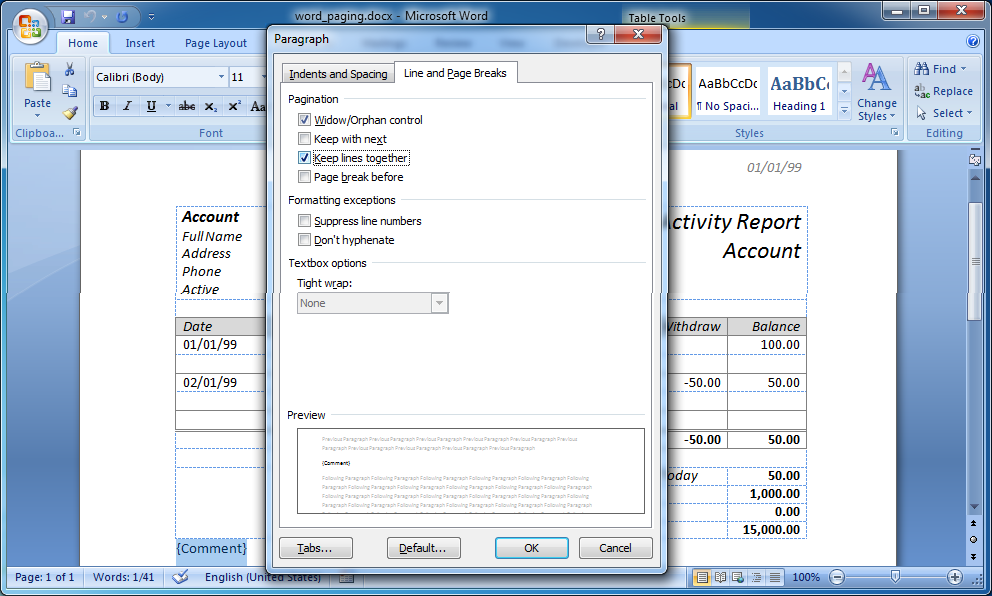
The exercise introduces the most common Word paging features.
Repeat Header Rows
If a table overflows onto the next pages then the top table rows marked as repeat header will repeat when continuing in the next pages.
Note: The repeat header rows must start from the first table row. If you want to start the repeat header after the first table row then you will need to split the table where the repeat header starts.
Note: Repeat header does not work for nested tables, which means there can only be one level of repeat header rows for the top level table starting at the first table row, which greatly limits its possible uses.
Keep with Next
Keep with next says that the paragraph cannot be separated from the next paragraph so if the next paragraph does not fit in the page and is moved to the next page then it takes the paragraph with it.
Keep with next is mostly used to chain multiple paragraphs or table rows (using the paragraphs in the table row) to a single unit that cannot be separated so either all of them fit in the page or they are all moved together to the next page.
The paragraphs are chained together by marking all the paragraphs keep with next except for the last paragraph to stop the chaining.
Keep Lines Together
Keep lines together says that the paragraph cannot be split into lines so either the paragraph fits in the page or the entire paragraph is moved to the next page.
Keep lines together only works on a single paragraph and cannot be used to keep multiple paragraphs or table rows together, use keep with next for that.
Note: Keep lines together is completely ignored and has no effect in table rows, which greatly limits its possible uses.
Allow row to break across pages
Another important paging feature especially for rows with a height of several lines is Allow row to break across pages in the Row tab, in the Table Properties dialog box.
If Allow row to break across pages is not selected then the row and its content cannot be split across pages and either the entire row fits in the page or it is moved to the next page.
Compile the template.
Create the .DOCX file.
Copy and run the code below.
#include "WordProcessingMerger.h" #include <exception> #include <iostream> #include <ctime> using namespace DocxFactory; using namespace std; int main() { try { WordProcessingMerger& l_merger = WordProcessingMerger::getInstance(); time_t l_start = clock(); l_merger.load( "/opt/DocxFactory/exercises/templates/word_paging.dfw"); l_merger.paste("Account"); for (int i = 0; i < 10; i++) { l_merger.paste("Withdraw"); } for (int i = 0; i < 9; i++) { l_merger.paste("Deposit"); } l_merger.paste("Total"); l_merger.paste("Summary"); for (int i = 0; i < 3; i++) { l_merger.setClipboardValue("Comment", "Comment", "CommentLine1\n" "CommentLine2\n" "CommentLine3\n" "CommentLine4\n" "CommentLine5"); l_merger.paste("Comment"); } l_merger.save("/tmp/word_paging.docx"); |
|---|
cout<< "Completed (in " << (double) (clock() - l_start) / CLOCKS_PER_SEC << " seconds)." << endl; } catch (const exception& p_exception) { cout << p_exception.what() << endl; } } |
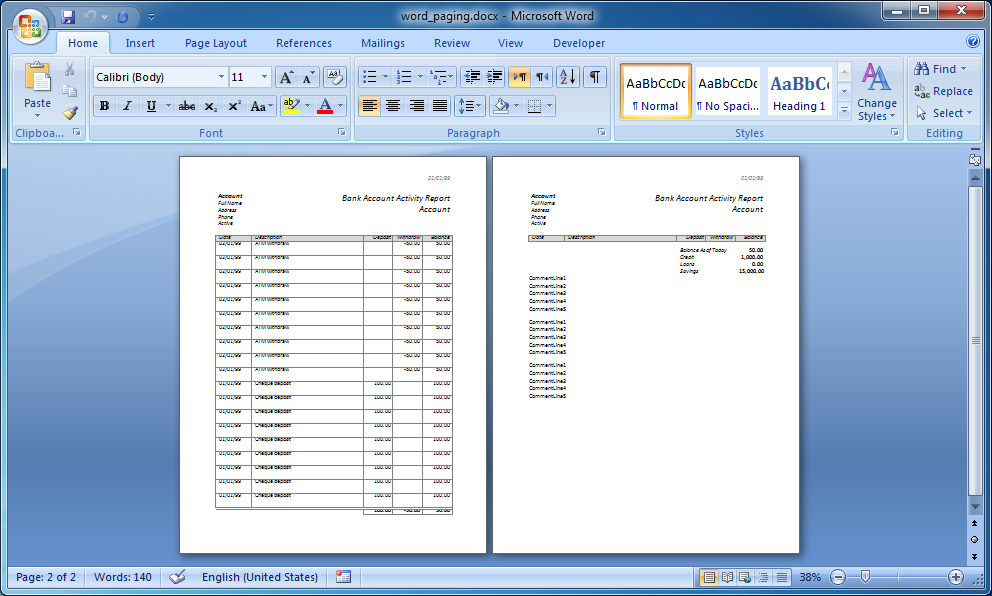
Open the created .DOCX file (see picture below).
You can change the number of line items, number of comments etc. in the code and recreate the new document to see how the report is divided into pages.
