Sections
In Microsoft Word, documents can be divided into sections and you can set a different page size and page orientation (but also other settings like header and footer) for every section. To divide a document into sections, insert a section break (which ends the previous section and starts a new section).
A single page cannot have two or more sections because every section has a different page type (page size and page orientation) so a section break (which ends the previous section and starts a new section) is also a page break. Just like regular page breaks, items should be placed between section breaks (or regular page breaks) and section breaks should not be placed inside items (see the chapter on top level items for a detailed explanation).
When designing a template, you set in what section the page the top level item starts is in. When creating a new document, if a new page is started when pasting a top level item that is in a different section than the last page then a section break is inserted and the same section page size and page orientation as the new page section are set. So the page the top level item starts is the same page type (page size and page orientation) in the created document and the template no matter what order the top level item is pasted.
Sections Exercise
Open sections.docx in the DocxFactory/exercises/templates/ directory.
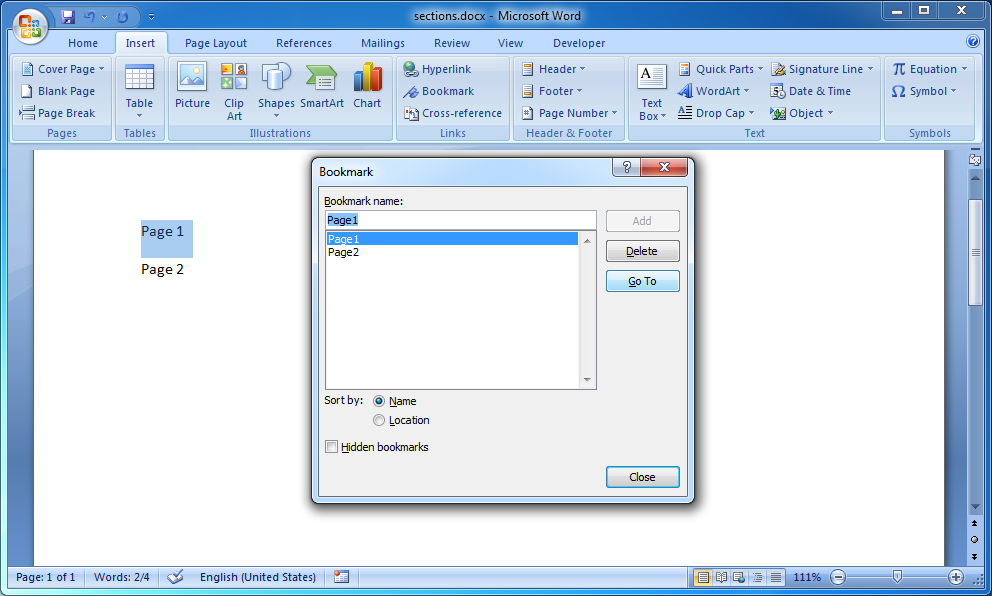
Open the Bookmark dialog box to view the items in the template. There are 2 top level items: Page1 and Page2 (see picture below).

Insert a section break between the two items.
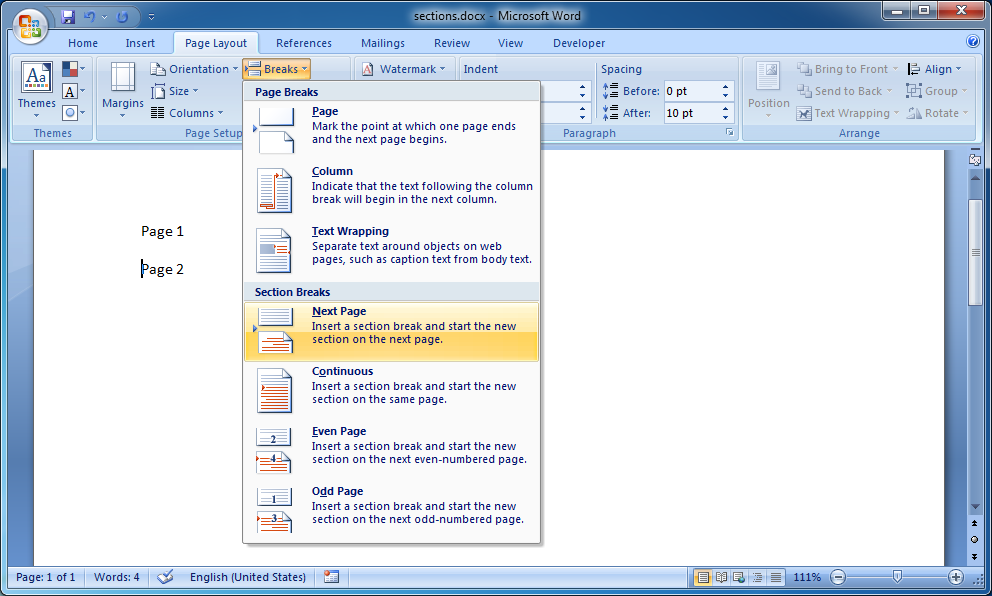
First place the cursor at the beginning of the second item. Then select Next Page, under Section Breaks, in the Breaks drop down menu, in the Page Layout ribbon (see picture below).

As you can see, a section break is also a page break.
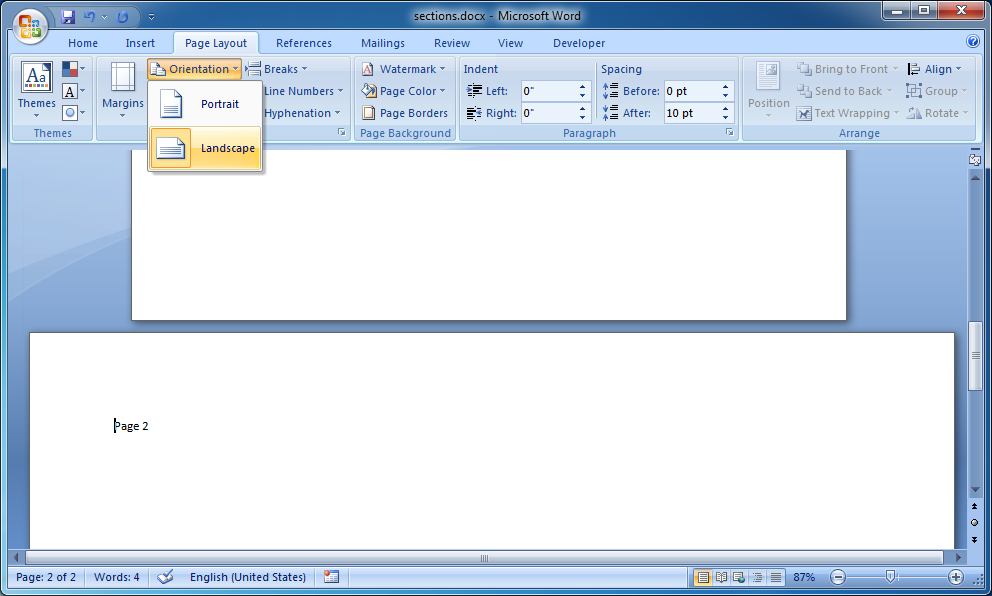
Change the section page orientation to landscape.
First make sure the cursor is on the second page. Then select Landscape, in the Orientation drop down menu, in the Page Layout ribbon (see picture below).

Compile the template.
Create the .DOCX file.
Copy and run the code below.
USING DocxFactory.*. DEFINE VARIABLE i AS INTEGER NO-UNDO. ETIME(TRUE). WordProcessingMerger:loadTemplate( "/opt/DocxFactory/exercises/templates/sections.dfw"). WordProcessingMerger:paste("Page2"). WordProcessingMerger:paste("Page1"). WordProcessingMerger:paste("Page2"). WordProcessingMerger:paste("Page1"). WordProcessingMerger:saveDoc("/tmp/sections.docx"). MESSAGE "Completed (in" ROUND(ETIME(FALSE) / 1000, 3) "seconds)". CATCH oErr AS Progress.Lang.AppError: MESSAGE oErr:ReturnValue VIEW-AS ALERT-BOX. END CATCH. |
Open the created .DOCX file.
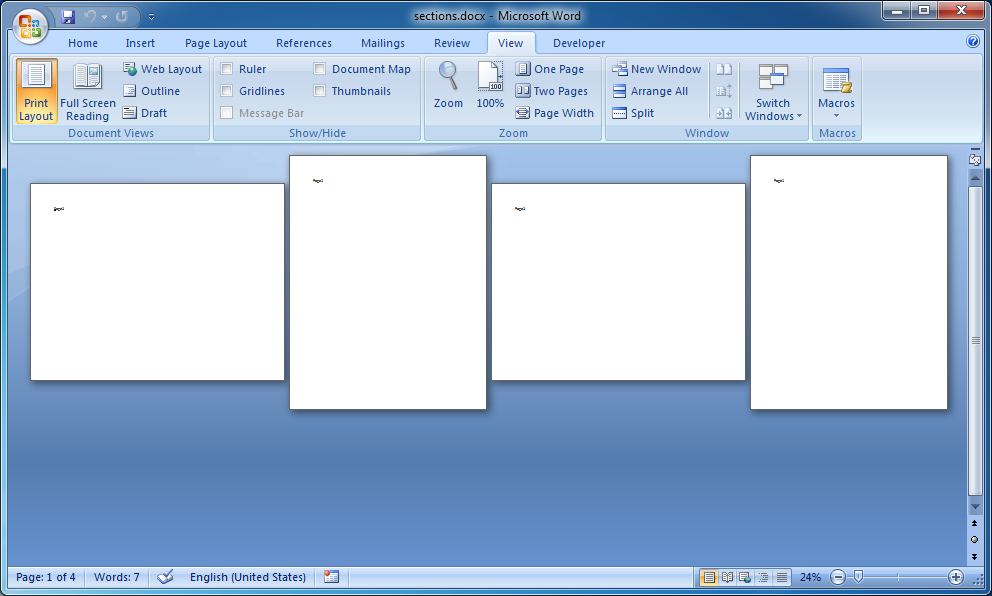
As you can see, the page the top level item starts is the same page type (page size and page orientation) in the created document and the template no matter what order the top level item is pasted (see picture below).
 |